How To Paint Golden Oak- Stair Remodel
See how we transformed our outdated golden oak staircase into a stunning focal point with a good bit of elbow grease and a fresh coat of paint. Discover how to achieve a beautiful stair remodel and give your home a modern and stylish upgrade.
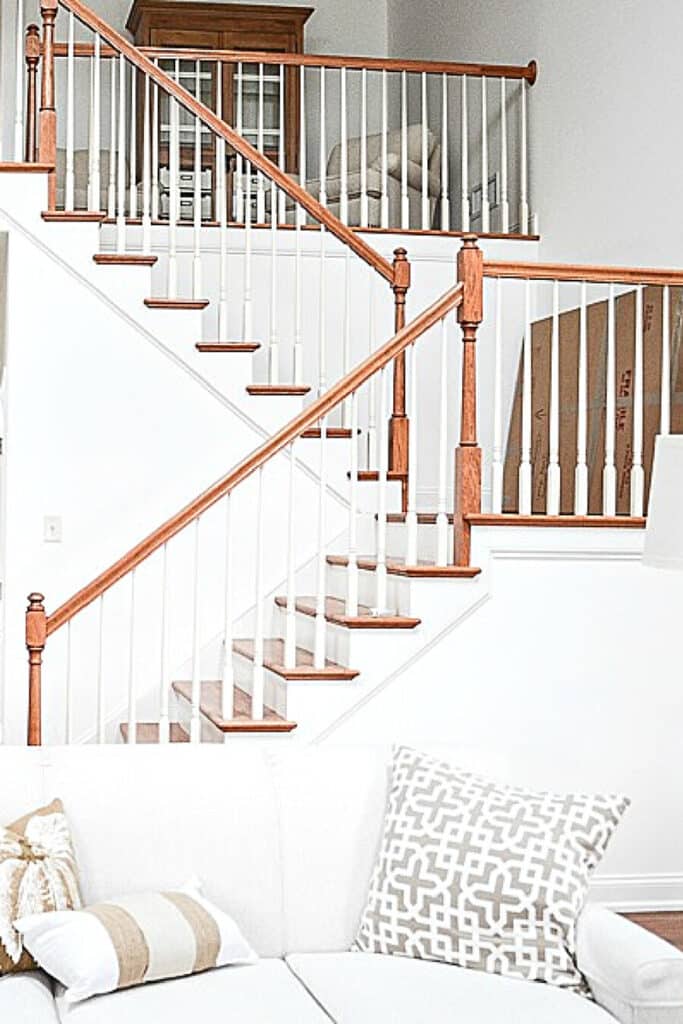
Our Tanglewood house has many things we love about it. But it had a couple big drawbacks that we knew we had to remedy even before we moved in. One was the kitchen, and the other was the golden oak staircase. A two-story stairway design loomed large. Not only the stairs but the railing of the upstairs loft too! We knew we had a stair remodel in our future.
Affiliate links included. See our Discloser Policy. As an Amazon Associate, I earn from qualifying purchases.
I’m sharing a step-by-step staircase makeover and a way to paint golden oak without seeing its distinctive grain.
Before And After
Let’s start out with the before and after pictures. It’s always fun to see the change side by side.
Our stairs are not in our entryway but are a distinctive architectural feature in the main part of our open-concept home. So they had to work with the color palette, style, and feel of our home.
Why We Painted The Stairs
First of all, I need to say if you have golden oak stairs in your home and love them, then that’s wonderful. We should all live with what we love.
Bobby and I knew even before we moved into our Tanglewood house that we would not live with two stories of golden oak stairs in our main living area.
We came up with a couple viable options for a stair remodel. We thought about replacing our existing spindles with wrought iron ones and replacing the existing banister and balusters with more natural wood ones. But these options included a lot of demolition and were very expensive. We also considered keeping the spindles and sanding down the golden oak parts and painting them with wood stain and polyurethane. But that did not take care of the grainy look of the wood.
There was also the issue of the spindles. Ninety-seven spindles painted an off-white like the original trim. We had the whole house repainted Simply White by Benjamin Moore before we moved in, except for the spindles. So if we decided to repaint the stairs, all the spindles had to be painted Simply White as well.
We finally decided filling in the grain and painting the staircase with semi-gloss enamel was the best option for our stair remodel.
Basically, the decision to tackle painting the stairs came down to retaining the unique staircase design, our budget, and sparing us the mess of demolition.
The Problem With Golden Oak
We knew this was going to be a huge DIY project that was complicated by the nature of golden oak. As seasoned homeowners, we do not shy away from even a complicated makeover!
The problem with golden oak is not only the orange-ish color of the wood but the grain. Golden oak has a deep grain and distinctive grain. If it was just getting rid of the color, a couple coats of paint would take care of that. It is really all about the grain!
When golden oak is painted over, the grain shows through. And this was not the look we desired. So we had to come up with a way of getting rid of the grain so the painted rails and newel posts were smooth.
Another problem was the adhesion issue. Would the paint we choose adhere to the handrails and newel posts? We wanted a semi-gloss finish on the railing and newel posts and did not want the paint to peel, chip, or rub off.
An Overview Of The Stair Remodel
This was a big project! So we made a plan.
Here’s a to-do list for this project…
- clean handrails and newel posts with an all-purpose cleaner and grease cutter
- tape off the walls and floor
- tent plastic dropcloths over the areas to be sprayed
- paint the spindles- lots of spindles
- fill in all the golden oak grain on the handrails and newel posts, and sand everything down
- vacuum and clean the stairs, handrails, newel posts, spindles, stairs, loft, and downstairs areas as we go
- paint the handrails- two coats
- paint the newel posts- two coats
- paint the quarter-round trim on the stairs- two coats
- take off tape
- touch up paint
- clean up
- shop for a stair runner
- have a runner installed on the stairs
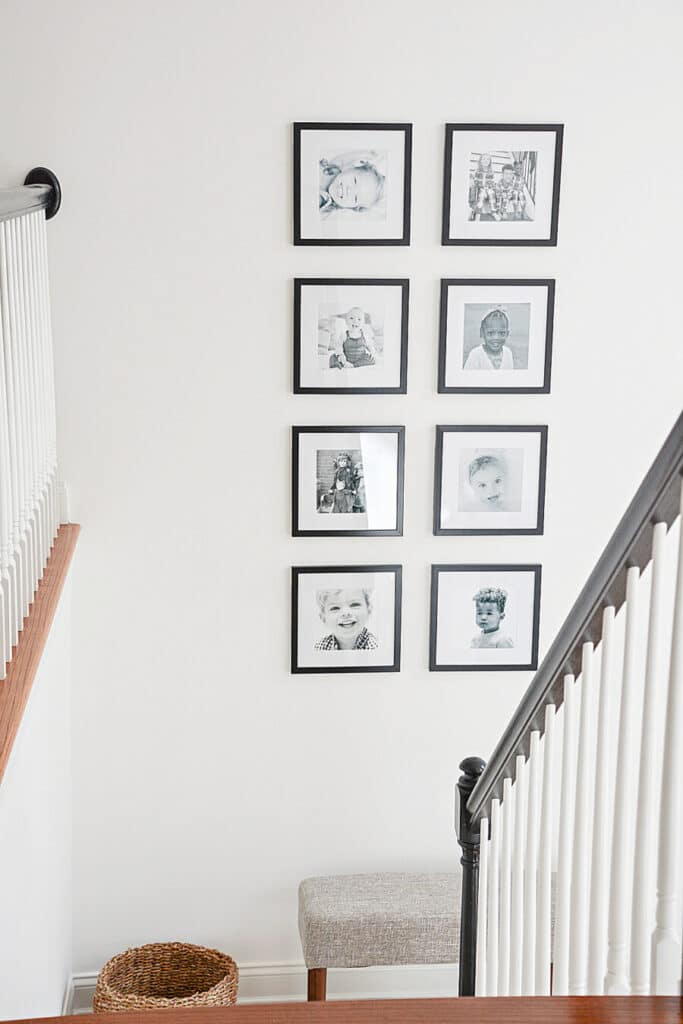
- hang artwork on the gallery wall on the landing
Most of the work was nothing new to us. We painted the stairs in our Tanglewood home. It was just going to be very work-intensive and time-consuming. But we were up to the task.
The biggest quandary was how to paint over golden oak and have the railing and newel posts look smooth. So Bobby and I scoured sources on the internet to find a solution. We finally decided on a plan. But, like any project, there were bumps and glitches along the way!
The Workforce
We asked our son Christopher if he would help us with this project. He can do almost anything when it comes to home projects. So I was the Project Manager (bossy but appreciative Mom) and organizer, and Christopher and Bobby were the workers.
Product And Tools
Products We Used
Here’s a list of the products we used for this project. All the paint was by Benjamin Moore.
Tools We Used
Here is a list of the tools we used for this project.
Clean Everything
The first step was to clean everything with an all-purpose cleaner to remove any dirt, grease, and grime. This was such an important step because the stairs needed to be perfectly clean so the paint would adhere to the wood.
Taping Off The Walls And Floor
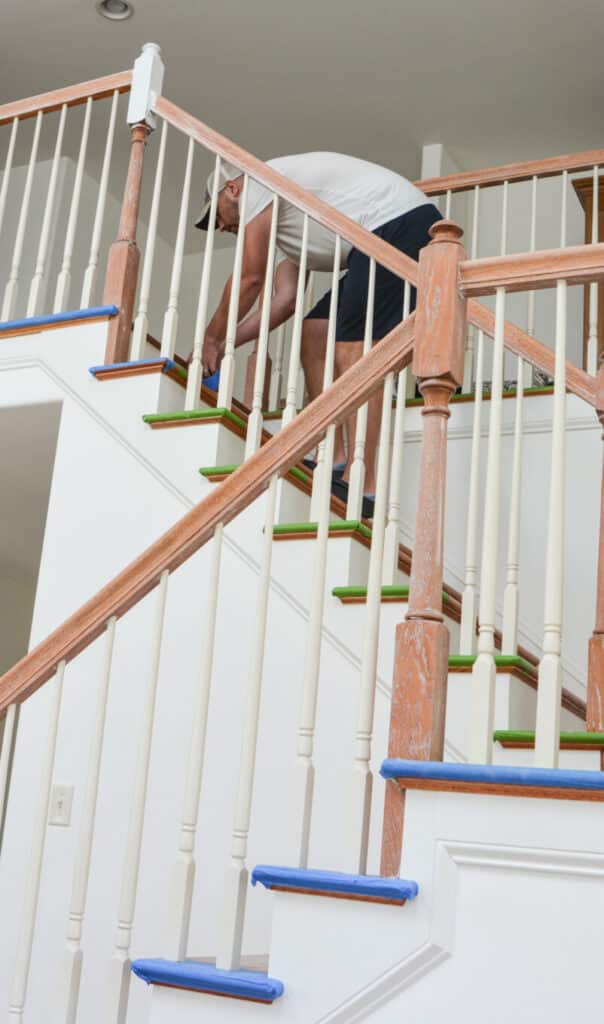
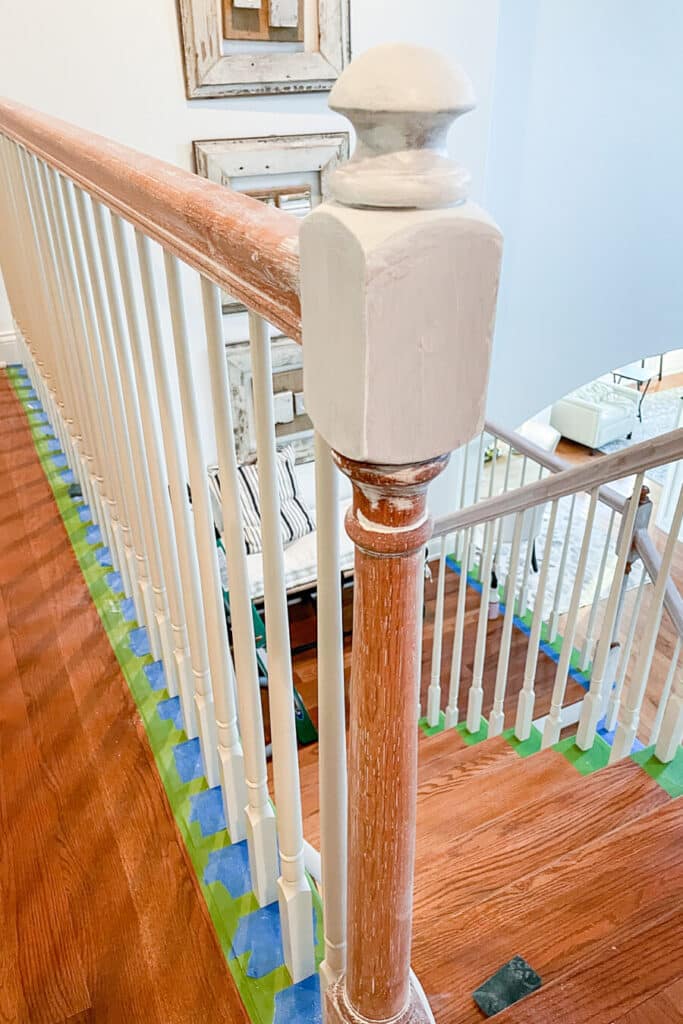
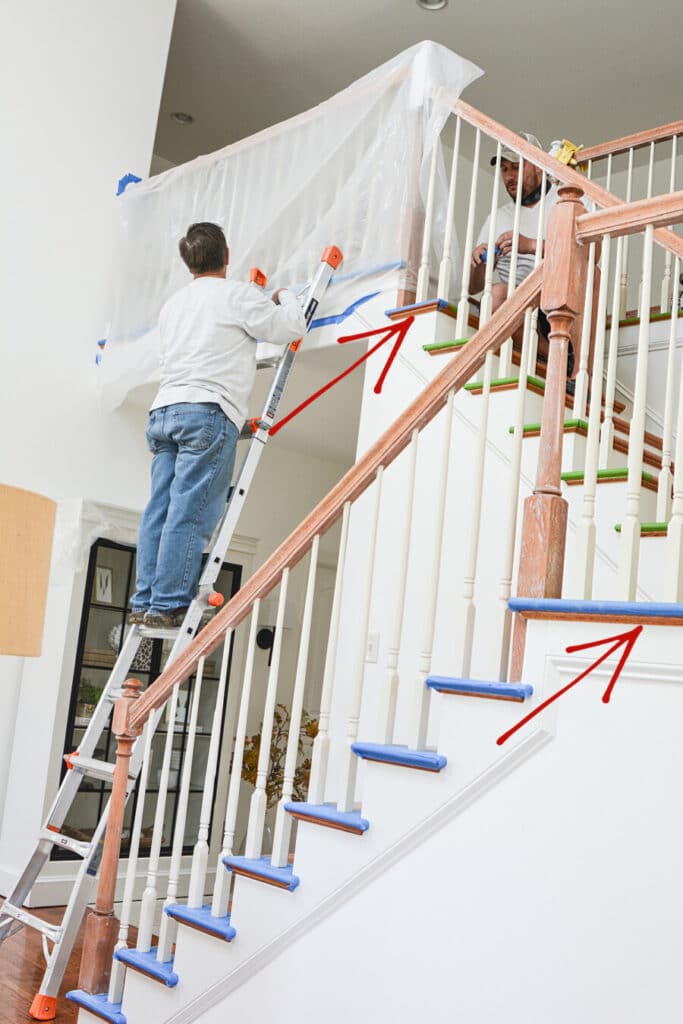
Everything about this project was big! We started off by taping off the stairs and the areas where the handrails met the walls.
The image below shows how precise the tape part of the stair remodel was.
Covering areas where paint could overspray or drip saved so much clean-up! Cleaning up the mess of paint on the walls and floor is far more time-consuming than taping!
Bobby and Christopher cleaned up as they painted and sanded. The sanding caused a good deal of dust. But the last thing Bobby did each day we worked on the stair project was to vacuum, and I dusted. This kept our home much cleaner to live in day to day.
Prepping The Golden Oak
The part of this project that we had to figure out was how to fill in the grain of the golden oak.
Bobby first tested a thick primer to see if it was thick enough to cover the grain. While it did not cover some of the grain, it did not cover the grain that was more deeply embedded into the wood. So this was a valiant attempt but a failure.
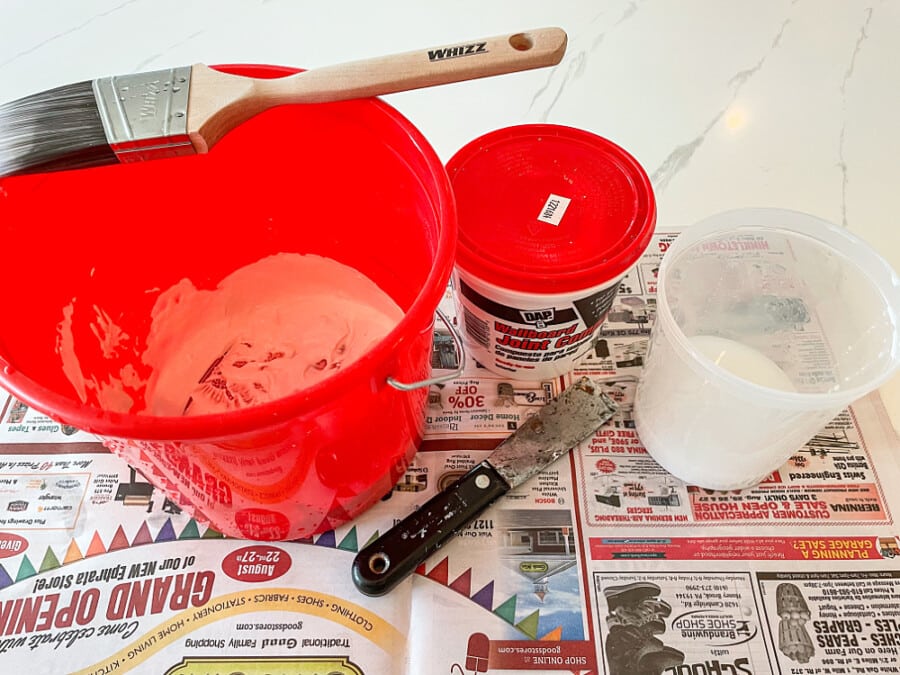
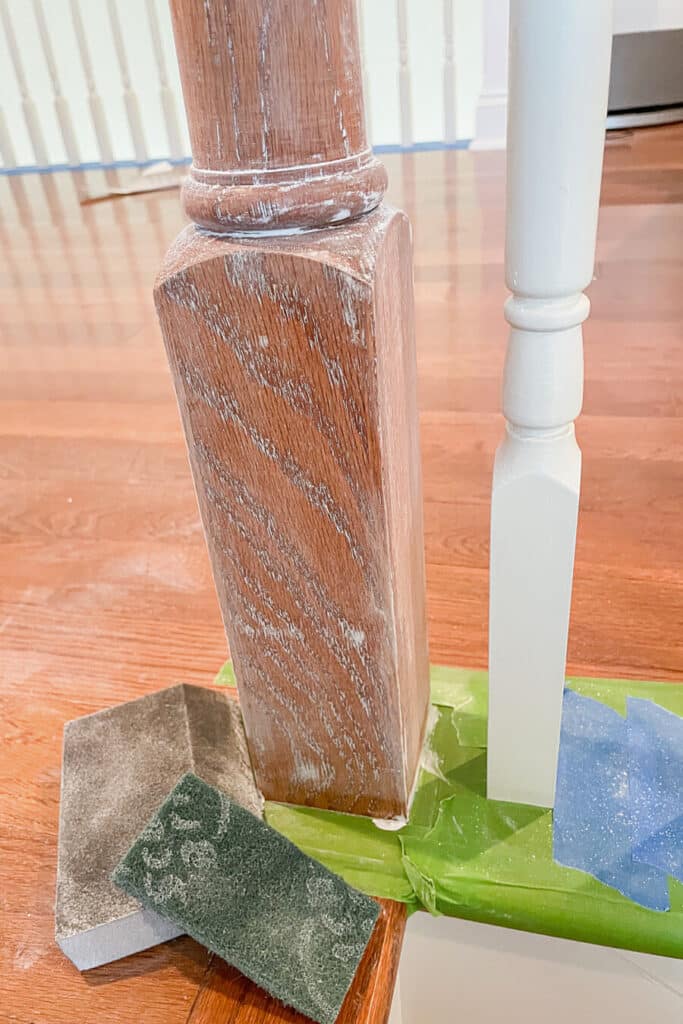
The next thing we tried to get rid of the golden oak grain was a mixture of joint compound and water. We watched several YouTube videos about this process. We decided to test smoothing out the grain this way.
Bobby mixed the joint compound and enough water so the consistency of the mixture was like very thick paint.
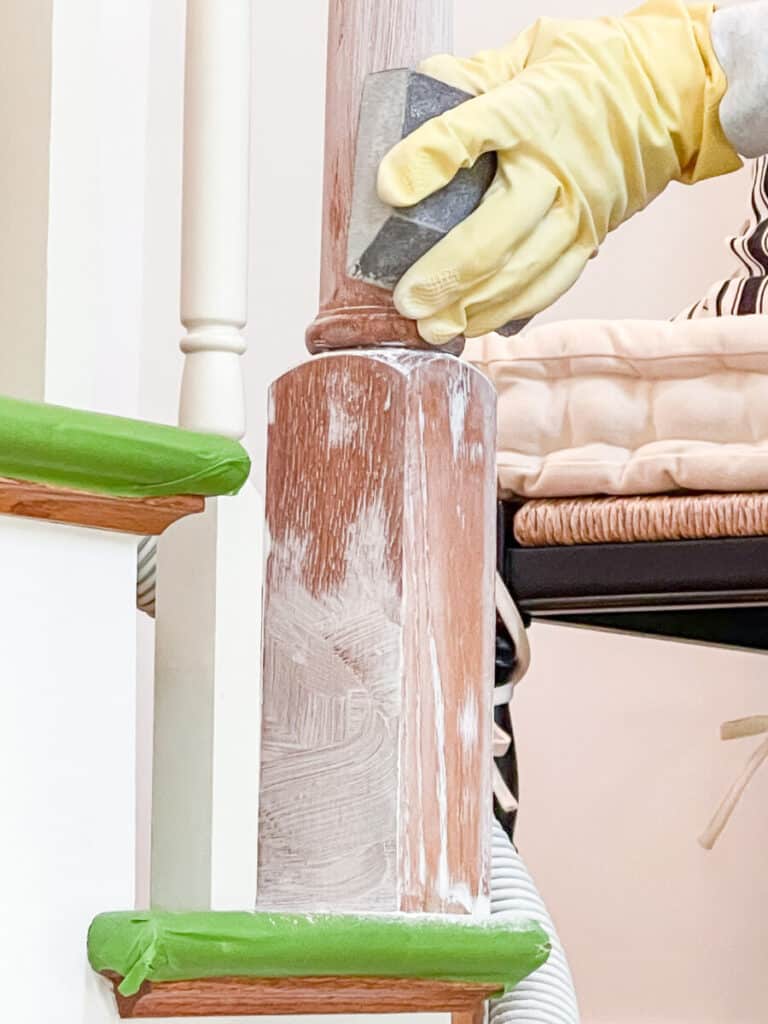
Then he painted a small section of the golden oak railing, let it dry, and sanded it down with a block sander and nylon steel wool. It worked! It covered up about 99 percent of the grain. And 99 percent was good enough for the Project Manager, me.
He did not paint the underside of the handrail with the compound mixture since it would not be that noticeable.
So section by section, the handrails and the newel posts were painted with the joint compound mixture. It dried quickly, and Bobby sanded it with a fine sanding block and nylon steel wool.
In places the grain was very deep, Bobby put a second coat of joint compound mixture on it the wood and, when it was dry, sanded it until the surface of the wood was smooth.
Caulking
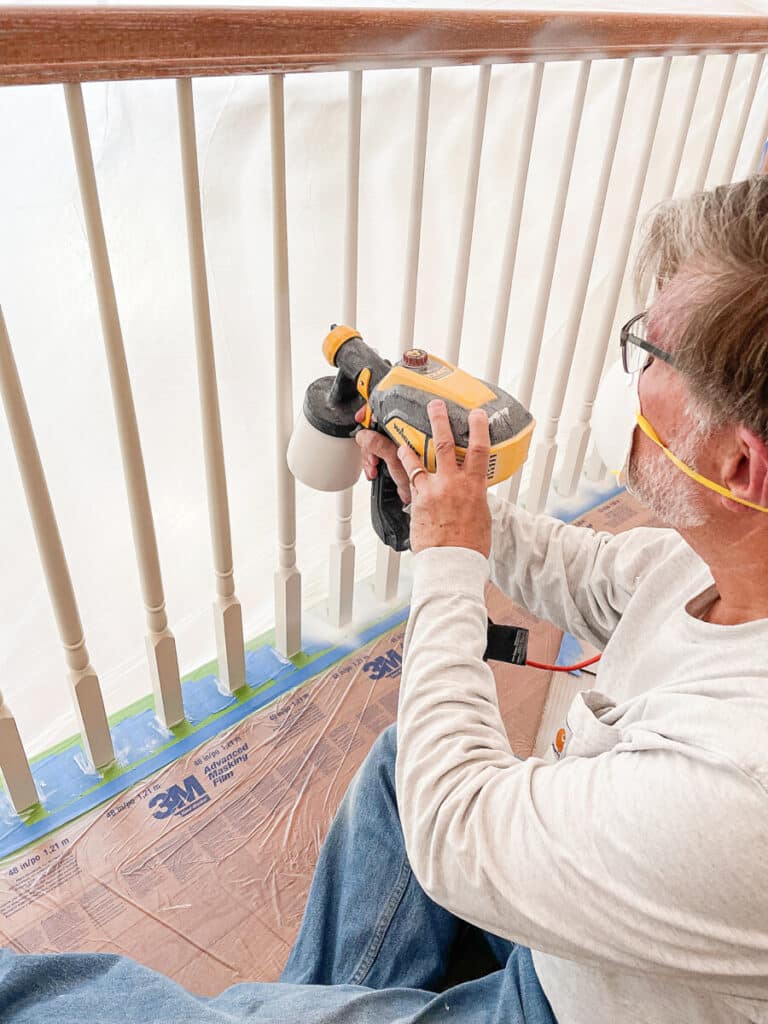
Painting the ninety-seven spindles was daunting work. The guys decided the best way to paint all of them was with a low-pressure paint sprayer. Christopher had used this tool on the spindles of his stairs when he repainted them.
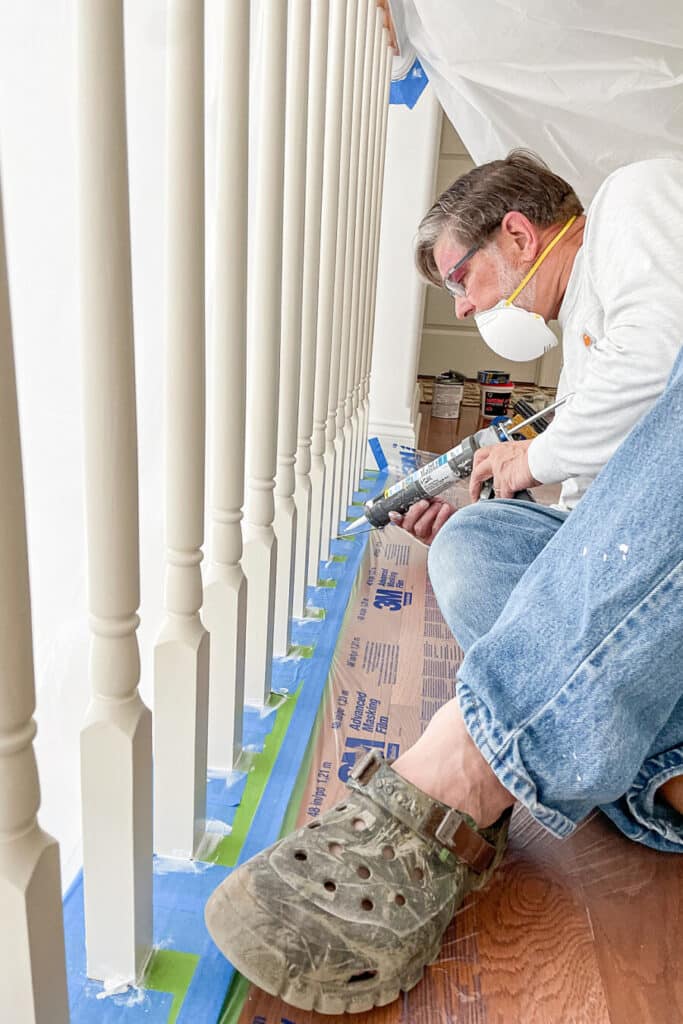
Using the low-pressure paint sprayer created a couple more steps in the prep process. First, Bobby caulked the base of the spindles with white caulk. There was a tiny gap between the spindles and the hardwood floor, so he added a bead of caulk to fill in that gap. This made the spindles look more finished and kept any paint from seeping into the crack and onto the hardwood floors.
Yes, those are crocks! Bobby’s work crocks. Sometimes you just have to love your husband more than you dislike his crocks!
You can also get a good look at the off-white colors of the spindles in the above image.
The other thing the guys did was add cardboard overlayed with plastic to cover the loft floors to protect any wayward paint.
Covering The Area With Plastic
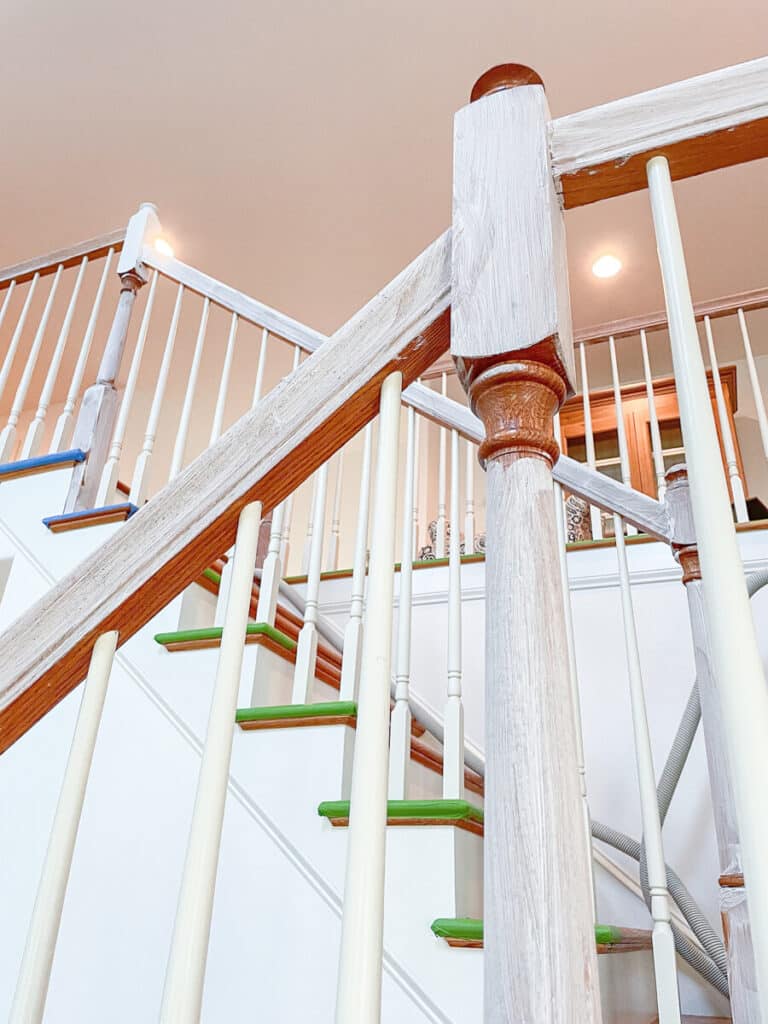
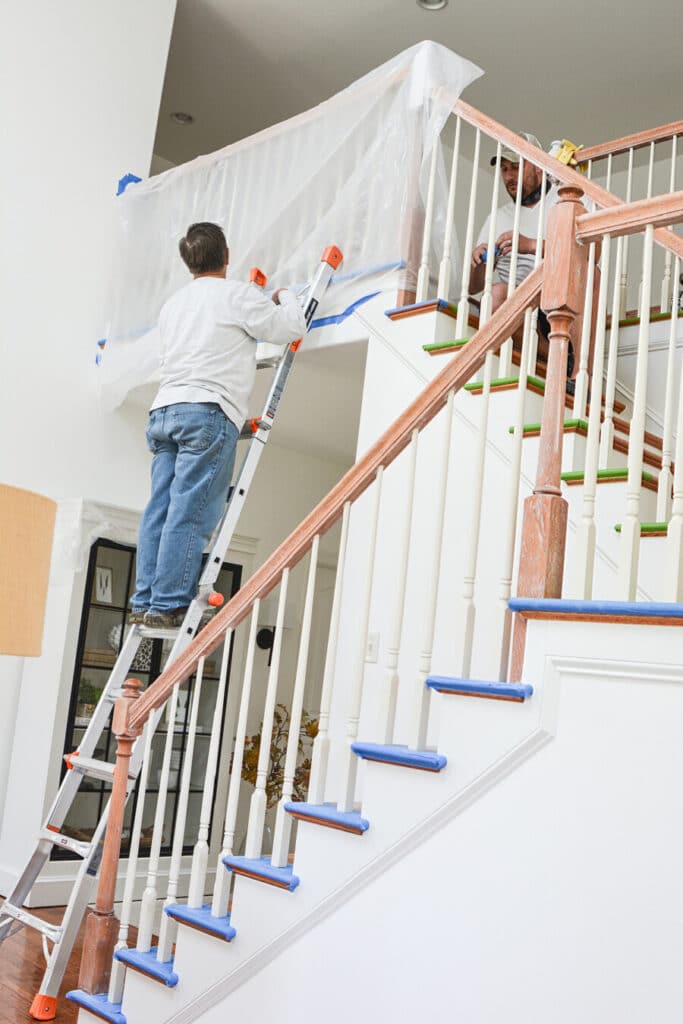
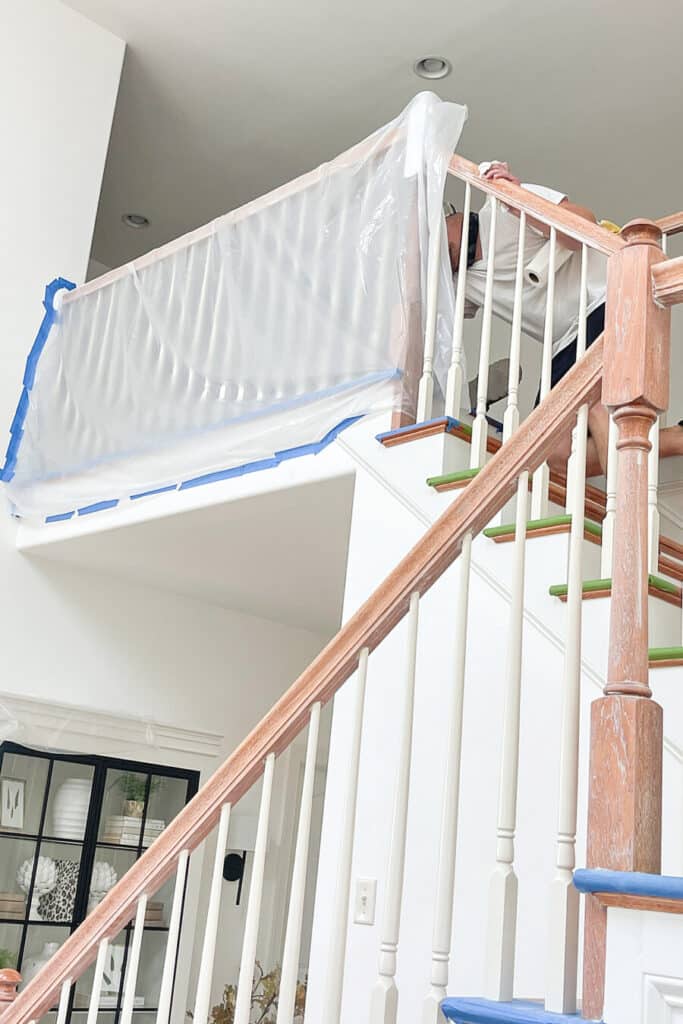
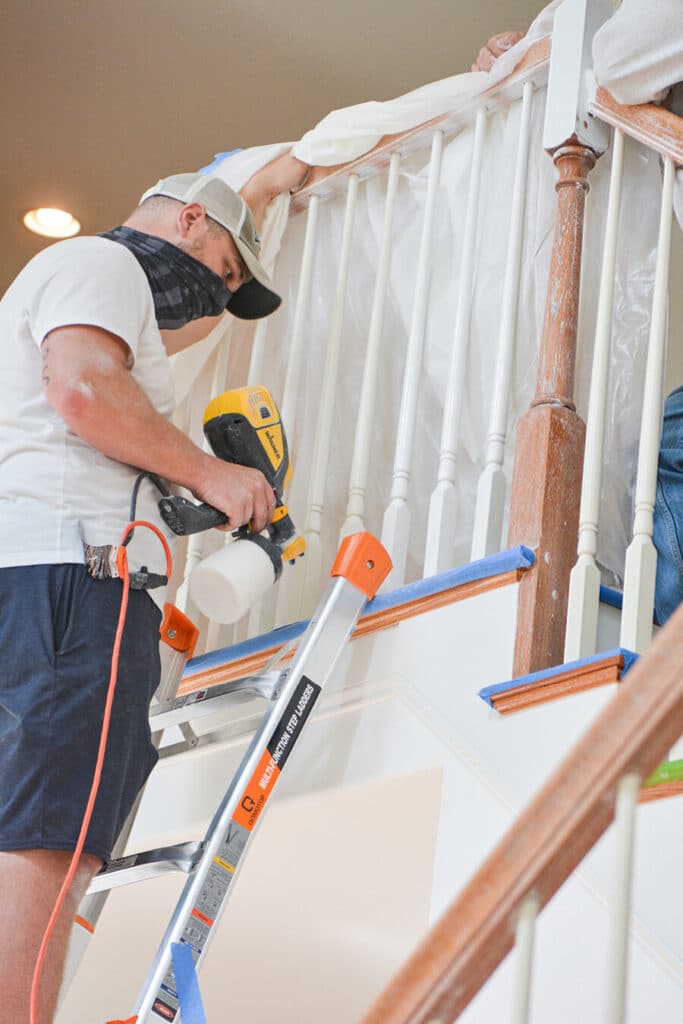
The boys prepped the area for painting the spindles by making a tent of plastic. A thin layer of plastic was taped to the banister’s inside and outside so when the spindles were sprayed, the plastic would catch the overspray.
This plastic dropcloth tent worked so well!
Spraying 97 Wooden Spindles
The painting process went quickly. It took only a few seconds to paint each spindle. The guys painted the inside of the spindles first and then the outside of the spindles. The low-pressure paint sprayer painted a very precise and light coat of paint. And it was very easy to control where the spray was directed.
We did not worry about the overspray on the railing because it was such a light coat, and the railings would be painted black.
Painting The Handrails And Newel Posts
The next part of the stair remodel involved Bobby painting all the stair railings and the balusters posts black. Sorry, I did not get any action shots. He painted on two coats of black Benjamin Moore latex semi-gloss enamel paint. Bobby used a small roller to paint the tops of the banisters and then smoothed the paint out with a paintbrush. For the rest of the rails, he used an angled paintbrush.
This was exacting work as he had to paint around where the spindles met the underside of the handrail.
Painting The Quarter Round Under Each Step
The last bit of painting Bobby did was to paint a tiny piece of trim that lay under the step on the outside of the staircase.
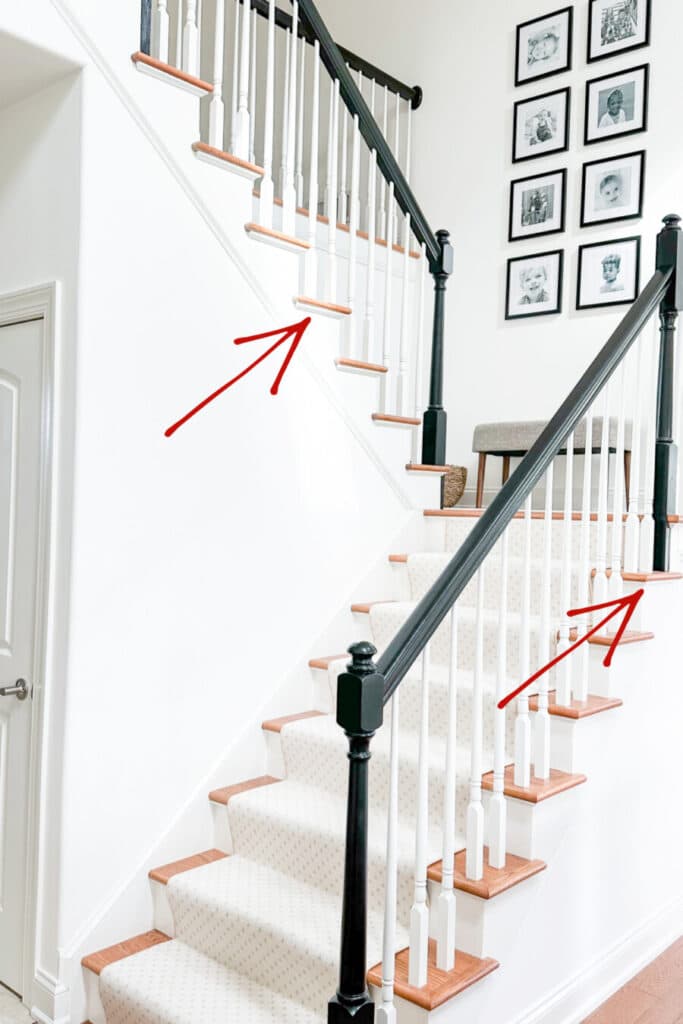
Painting this made a huge difference to the side view of the staircase. It reduced the look of the golden oak trim by half.
How Much Paint Did We Use
I was surprised by how little paint this stair remodel took! We used about a gallon of Simply White enamel for the spindles and the quarter-round molding and a little over a quart of Black enamel for the railing and newel posts. This helped keep the cost of this project very low and economical!
The Rug
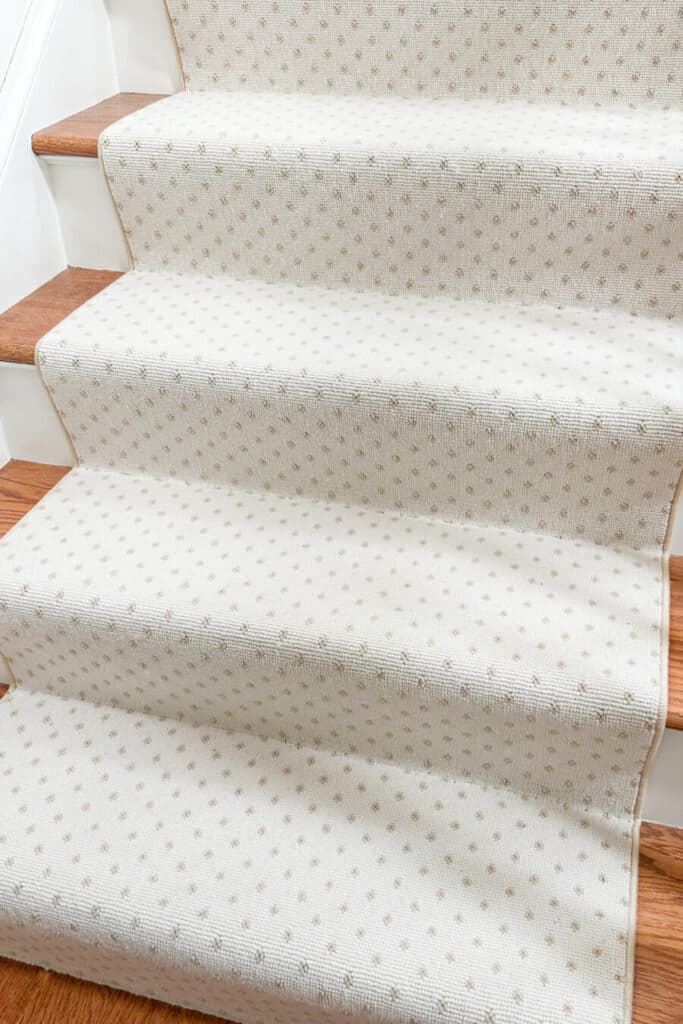
We installed a custom wool carpet that was cut and bound and made into a runner for the stairs. It is rugged, and stains and spills clean up easily. I’m a fan of wool rugs for their overall durability.
The oak steps were bare when we moved in, so thankfully, we did not have to deal with pulling up and getting rid of an old carpet.
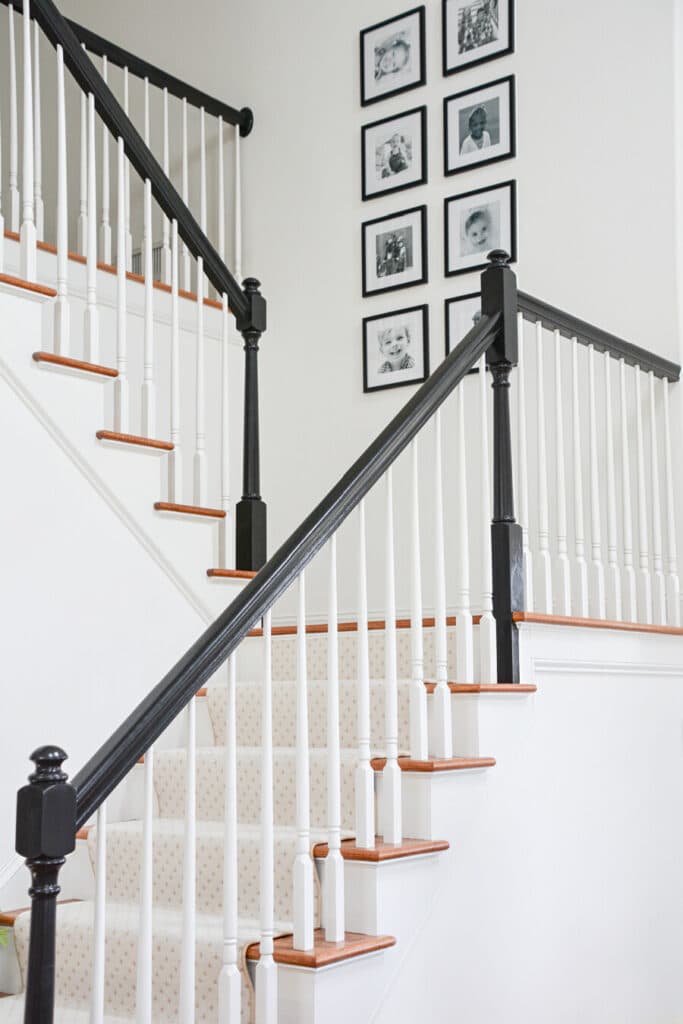
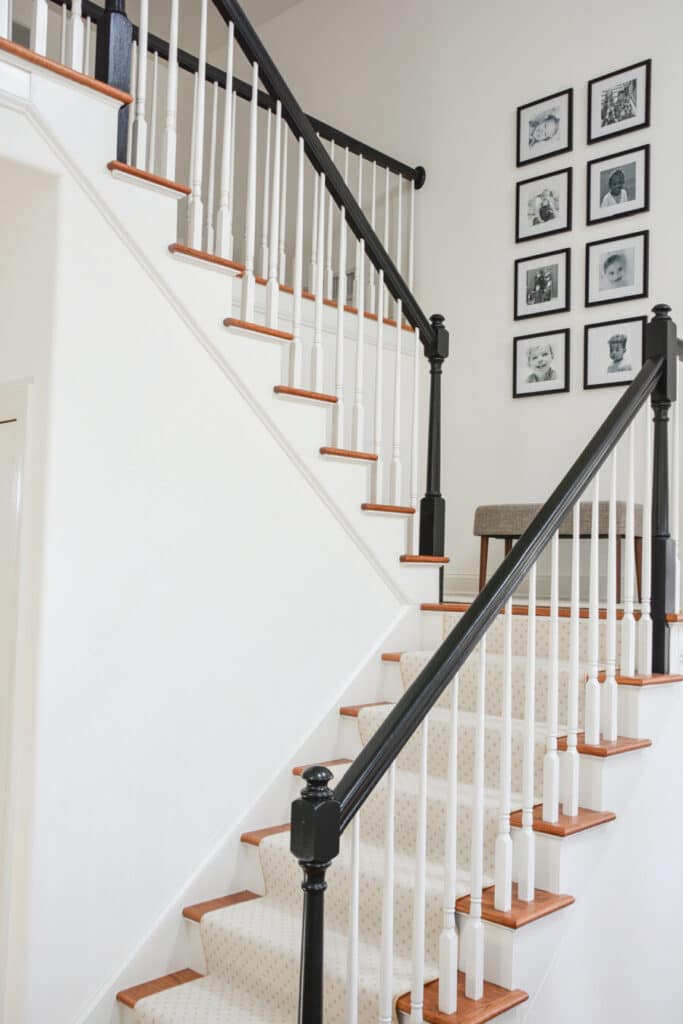
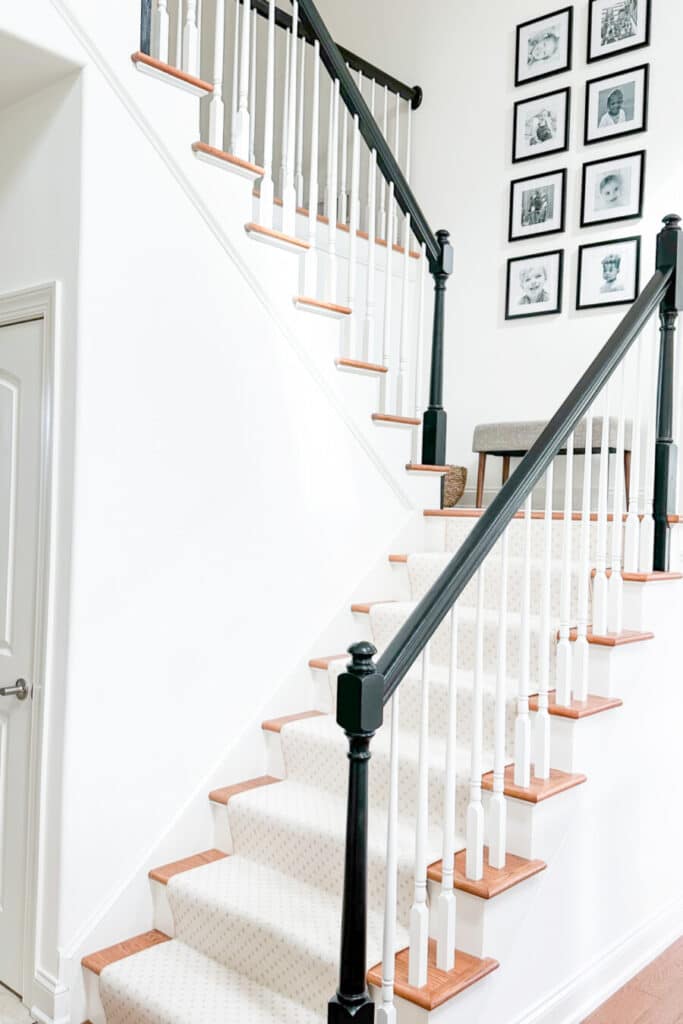
I wanted to keep the look and feel of the carpet light but not white. So I chose an off-white rug with little beige dot-like motifs. Our stair risers were already painted white, and the stair runner covered up a lot of the golden oak stair treads, and that made me very happy!
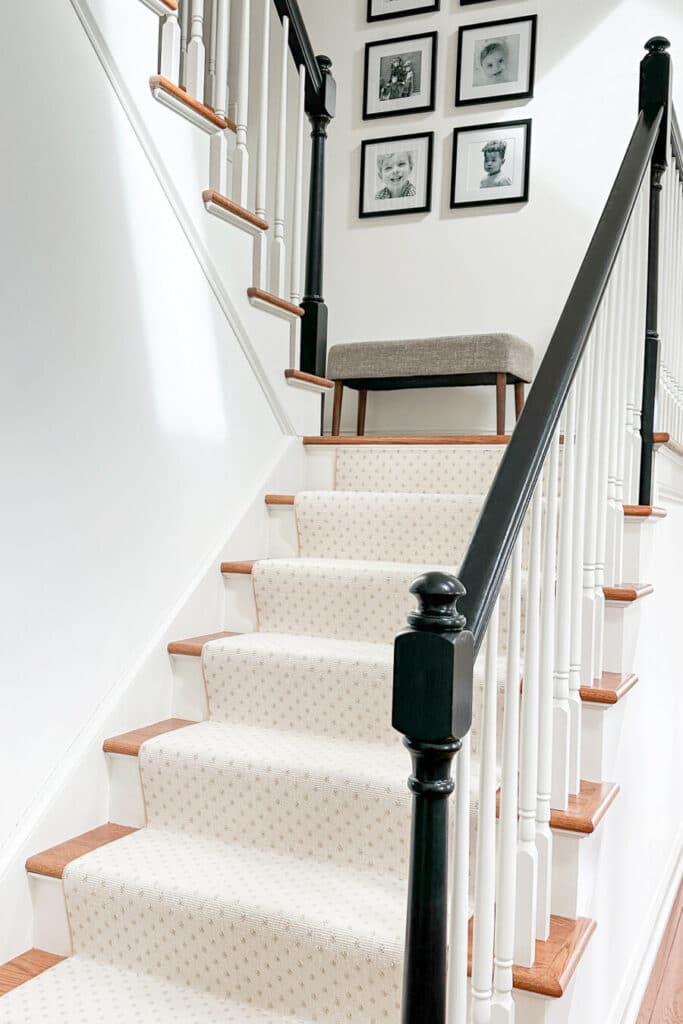
To finish our stairs, we hung a gallery of our six grandchildren on the landing wall. And I put a simple gray upholstered bench on the landing. I wanted to keep everything on our stairs very calm and monochromatic. The stairs are a huge architectural element in our home did not want anything that would cause it to be a focal point.
BTW, the top left picture of our granddaughter is not hung wrong. She was lying on her side in the picture.
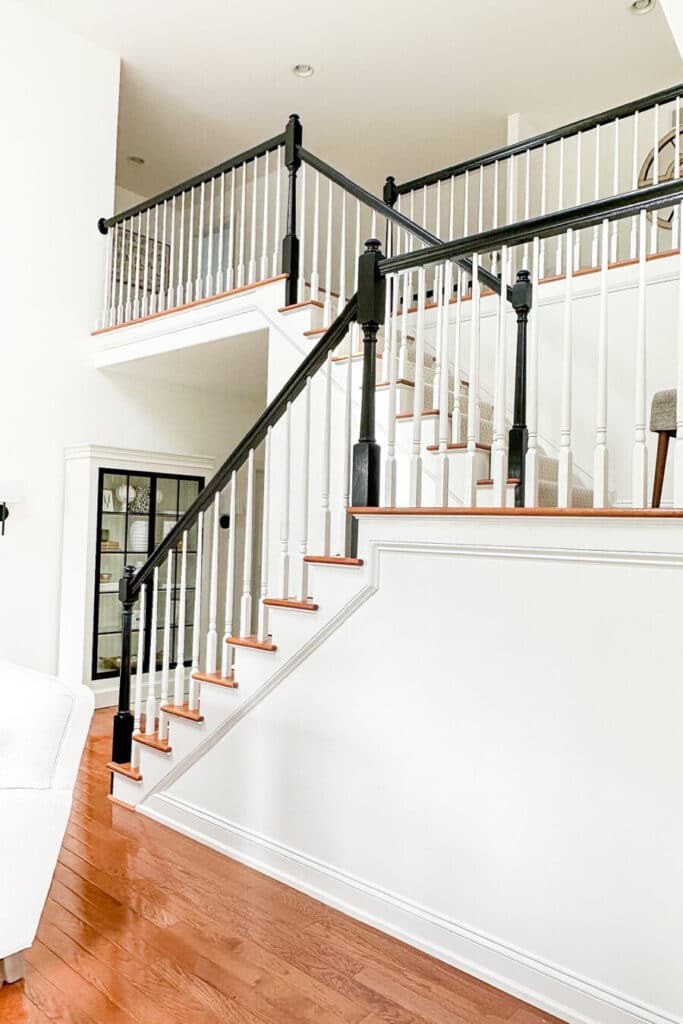
Our staircase went from being a dated, golden oak monster to a classic black and white architectural feature that adds beauty and style to our home.
Although this was a lot of work, the stair makeover wasn’t very hard, and we are thrilled with the way it turned out. I hope this has given you some idea of how to paint over golden oak and how to tackle a stair remodel.
Shop The Post
Shop the items in this post. A similar item was substituted when the original item was no longer available.
Frequently Asked Questions
What is the cheapest way to renovate stairs?
The cheapest way to renovate stairs is probably painting them. It does not cost much to paint stairs, and if you do it yourself, you do not have to pay for labor.
How can I make a wooden staircase look better?
There are several ways to make a staircase look better without renovating it. First, deep clean it. Stairs build up lots of dust, oils from hands, and dirt from foot traffic. Give it a good cleaning. Think about adding a new runner to your stairs. This will make a huge difference in the way your stairs will look. A new lighting fixture, wall art, riser decals, and accent decor on the landing are updated ideas for making stairs look nicer.
How much does a stair remodel cost?
The cost of a stair remodel varies greatly. It all depends on what you want to do to remodel your stairs. The more you do, the higher the cost. Painting existing stairs is at the low end of the cost spectrum and tearing out stairs and reconfiguring them is at the higher end.


The staircase is beautiful! What a difference! I have a similar staircase and I think I will try to remodel mine using your instructions and tips. Will you tell me where you purchased the frames for your grandchildren’s pictures? When I click on the picture I get an error. Thanks, Yvonne. I always enjoy your well-written and informative blog.
Sorry about that. I’ll fix it.
Great job and really updates the area!
Thank you Mary Jo! I’ll pass that along to Bobby.
Your staircase looks absolutely gorgeous! Such a lovely transformation. Thanks for sharing.
How kind Rose!
Hi Yvonne,
We have actually the same staircase & spindles in a 1987 garrison colonial. I have been wanting to do this for years, maybe now that my husband can see it in black & white he won’t be so hesitant in attempting this make over. Thank you for sharing, always enjoying your posts!
Eileen
You go girl! I’m on team paint the stairs.
Nice job! I love that you have found ways to accept and live with golden oak. 😉
Since we will not be ripping up our flooring and installing new hardwood I must find ways to make my peace with my floors. I really want to paint them all white, but Bobby, who refuses me nothing said a hard no.
Great job! I’m glad you left the treads the golden oak as it ties in with the floors, you can change them when you eventually update flooring. PS, I have a pair of work crocs too! I never leave the house with them, but they are the best for knocking around the house. Pair them with some white socks and I feel like a fashionista!
LOL! My husband says that are so comfortable too!
Labour intensive but so worth it. It now suits your color scheme and style, Yvonne. Having your son Christopher along was a huge help with his already gained knowledge and youthful energy.
I have golden oak bedroom furniture. Love the size and style but hate the grain and color. I’ve been wanting to refinish the bureau, tall boy and night tables for years but was afraid of just ruining them. I may have the courage now that you have shown me the best way to hide the grain.
Yay! You will be so surprised at the magic of paint in transforming furniture.
This looks absolutely beautiful, just like the rest of your home, Yvonne. Well done to Bobby and your son Christopher, and you of course for managing the project!
LOL, thanks Julie!
That was quite the project !! The end result is updated and beautiful.Love the black handrail.
Thank you Doreen. The work was so worth it!
Love it!! Wondered about painting wood, but it looks great. So much work. What a great team! Thanks for all the detailed instruction. You are always so open and willing to share.
Curious about the picture grouping. The upper left picture is turned sideways. I had to laugh at that and I think I might do that with my next grouping. Wish we could sit and have a scone together. Blessings, Jo
My granddaughter is laying on her side. You can’t tell from the the images on the blog, but in real life you can. LOL!
Wow! What a transformation. Love the runner you chose for the stairs. Great job!
Thanks so much Jan! We are very happy with how it turned out.
Speechless! Absolutely gorgeous❤️
Thank you June! The work really paid off!
The staircase is gorgeous!
Thank you Mary!
This redo was a LOT of work, but it turned out to be lovely! My question is about the landing at the turn of the staircase. Did you leave it golden oak wood, or did you cut a separate piece of carpet the shape of the landing and install that? The curve of the staircase does not allow for a continuous piece of carpet. I’d love to see a photo looking down from the top.
Yes, that is just what we did.
Plain golden oak wood or a cut piece of carpet?
Oh it looks beautiful! I love it. I can’t believe I still haven’t been to your house:):) Have a great weekend, my friend. XO
Thanks, friend! I would love you to come and see our home.
Let’s try to make a date to get together!
Hi Yvonne,
Great post thanks for the inspiration, it looks terrific! Can you share where you got the runner and any other options in runners you were considering?
We went to a local flooring and carpeting store we have used for decades. There were lot so different choices but I can’t remember what they were called.
Sheer Yvonne genius. At first I did not like the black railing. When the carpet and framed items were added it works. Very designer lovely.
Thanks, Nancy. Because our staircase is open to much of the house I wanted to paint it so there was still a lot of white and the black gave the stairs interest without being overwhelming.
Eight years after moving into our new house, we are still living with builders grade white paint on all the walls. I need help choosing a paint color. Can you recommend a soft white for our bathrooms? Thank you
Hi Lin, I get asked about paint all the time. However, to give you some suggestions I would need to know the undertones of your flooring, cabinets and any other surfaces. Paint need to work with the undertones of what else is in your room. I suggest you read this post. It will help a lot: https://www.stonegableblog.com/can-you-mix-warm-and-cool-colors-in-decor/
Gorgeous! What a great transformation.
A beautiful update!
Hi! I was wondering if you used any primer after the compound and sanding? Or did you go straight to paint? If you do prime do you have a recommendation?
We went straight to paint. The paint contained primer. Hope this helps.